
These instructions will help you remove hard drive, memory, wireless card and keyboard from a HP Pavilion dv9000 series laptop. All these components, except the keyboard, can be accessed through the bottom of the laptop.
In the next guide I will explain how to disassemble laptop display panel and remove inverter board with LCD screen.
Do not disassemble your laptop if it's still covered by the manufacturer's warranty or you loose the warranty. Are you looking for spare parts for your HP Pavilion dv9000 laptop?
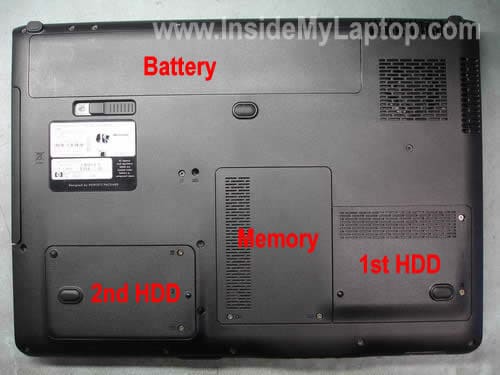
First of all, remove the battery. Remove screws from the 1st hard drive and memory covers. Remove both covers.
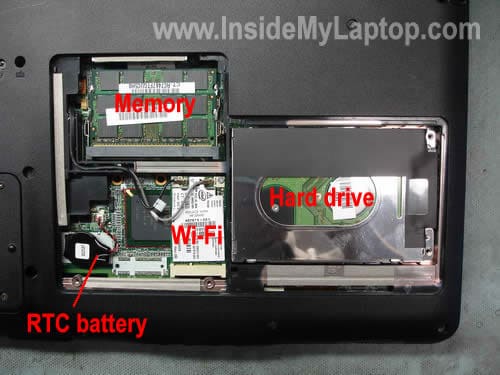
Under the memory cover you will find the wireless card and RTC battery.
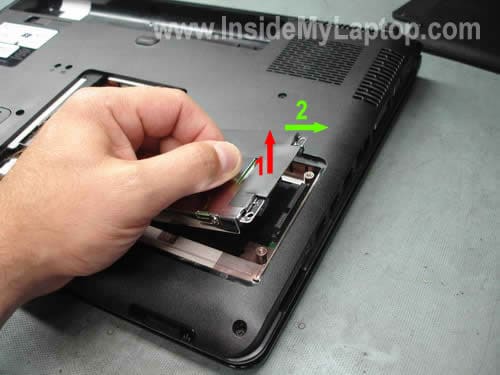
In order to remove the hard drive, lift up the right side of the drive assembly (move 1) and then pull it to the right (move2). If you are replacing the hard drive, you'll have to transfer the caddy and connector to the new drive.

Before you remove the Hp Pavilion dv9000 battery and wireless card, you'll have to disconnect both antenna cables pointed with green arrows. Simply unsnap both antenna cables from the wireless card with your fingers. After that remove two screws securing the wireless card and pull it from the slot by the edges.

Some Pavilion dv9000 laptops have only one hard drive installed. As you see, in my case there is no second hard drive under the cover.
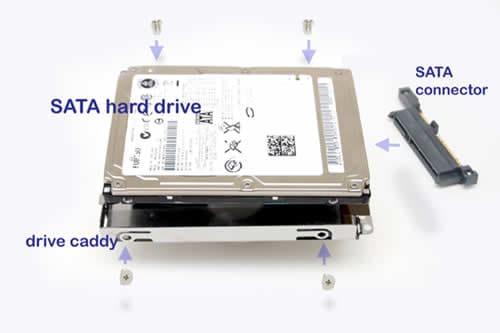
If you would like to install second hard drive into your notebook, you'll have to purchase a new SATA drive, SATA connector and drive caddy. You'll find step by step hard drive installation instructions in this guide.
we will refer to all HP Pavilion dv9000 battery, dv9000t, dv9100, dv9200, dv9300, dv9400, dv9500, dv9600 & dv9700 notebooks as the "dv9000″ since adding a hard disk drive (HDD) to all above mentioned notebooks are similar.
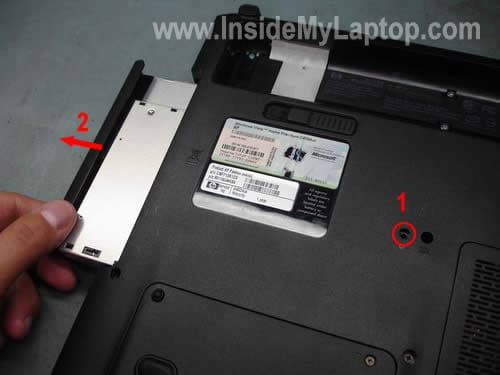
In order to remove the CD/DVD drive you'll have to remove the securing screw (1) and then carefully pull the drive from the laptop.
KEYBOARD REMOVAL INSTRUCTIONS
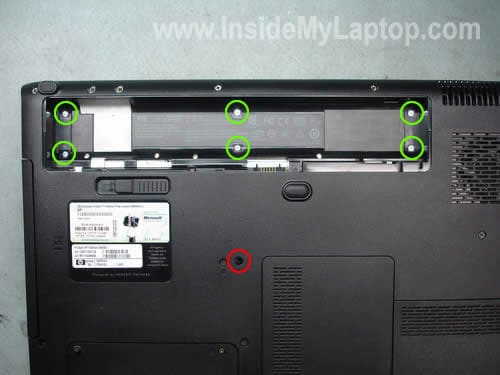
Remove six green screws securing the keyboard bezel and one red screw securing the keyboard.
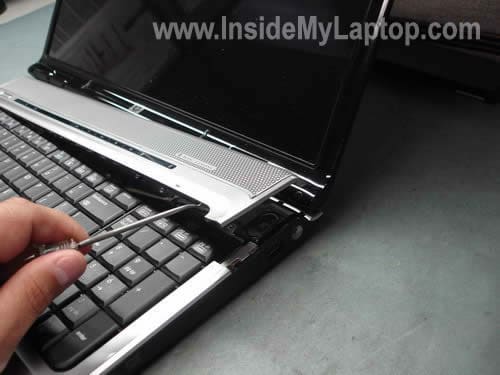
Carefully start removing the keyboard bezel with a small flathead screwdriver.

Be very carefull, the bezel is attached to the motherboard with a flat ribbon cable. The cable location is pointed by the green arrow. Do not disconnect this cable. Simply place the bezel as it shown on the picture below.
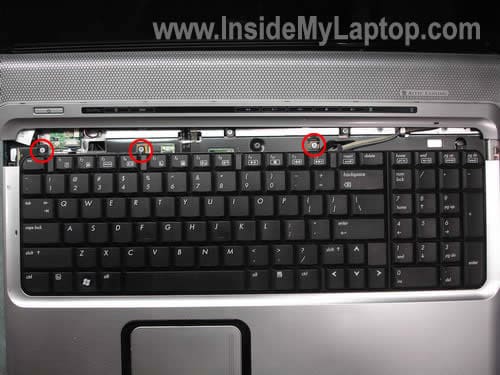
Remove three screws securing the laptop keyboard.

Lift up the keyboard. Be carefull, it's connected to the motherboard.
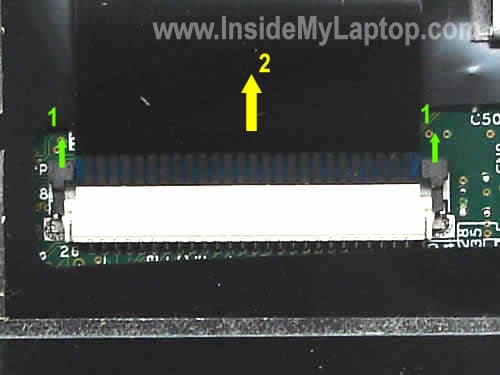
In order to release the keyboard cable, you'll have to unlock the connector as it shown on the picture above.
1. Slide the connector lock to the direction shown by two green arrows with your fingernails.
2. Pull the keyboard cable from the connector.

Now you can remove and replace the keyboard with a new one. You'll find more detailed laptop disassembly instructions in the official service manual for HP Pavilion dv9000 (3.72MB pdf file).


2 comments:
very useful post!
Very nice article, I enjoyed reading your post, very nice share, I want to twit this to my followers. Thanks!. chp pavilion ar5b125 charger
Post a Comment